Focus stacking
Focus stacking is a post processing technique that helps overcome one of the difficulties especially with macro photography where you have a very narrow depth of field (usually because you are so close to your subject). A series of images are taken where the plane of focus is changed with each frame essentially forming a series of slices through the subject that are in focus. These are processed on the computer and the ‘in focus’ slice from each images being stacked together to give you a final image that appears to be entirely in focus. These can be made up of a few to many hundreds of images in extreme cases.
The image of the germinating seed opposite is made up of 24 images processed with Helicon Imaging Software. An overview of the process is given below with some links for further reading.
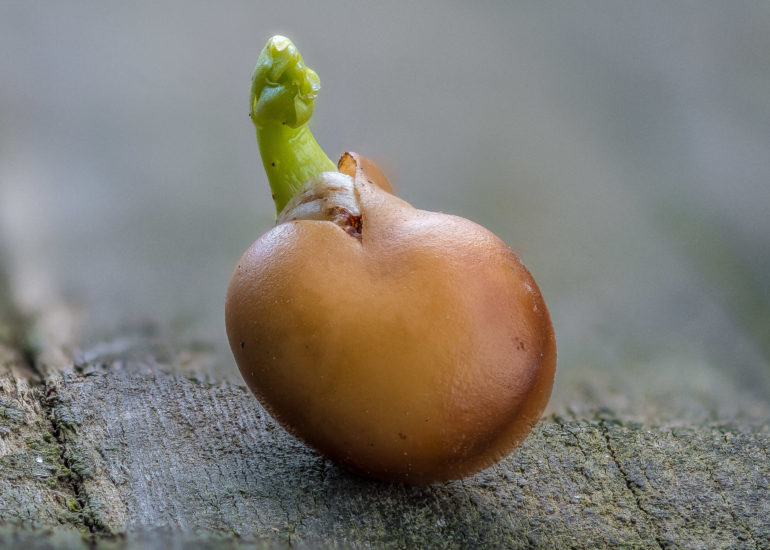
If we take the image of the germinating seed shown above as an example, as mentioned, it is composed of 24 images, they are all shot using a Nikon Nikkor 105mm macro lens at f5.6, 1/30 second exposure and 100 ISO.
As you will probably be aware the aperture of the lens (f-number) is one of the factors that determines the depth of field (essentially the slice of the image that is in acceptable focus). The larger the f-number the smaller the lens aperture and the greater the depth of field. Why did I use f5.6 and not f22 in that case? At this closeness the depth of field is so narrow that at f5.6 it might be 2mm and at f22 it might be 4mm (just an example, I’ve not done the maths so these are just guesses to illustrate the point!), but each lens has a sweet spot if you go to too small an aperture you get other effects coming into play such as diffraction (the way light bends through the lens to get through the small hole then onto the camera sensor) so what you gain in increased depth of field you loose in image quality and of course you need a longer exposure to ensure the exposure is correct. As with everything in photography it is a compromise.
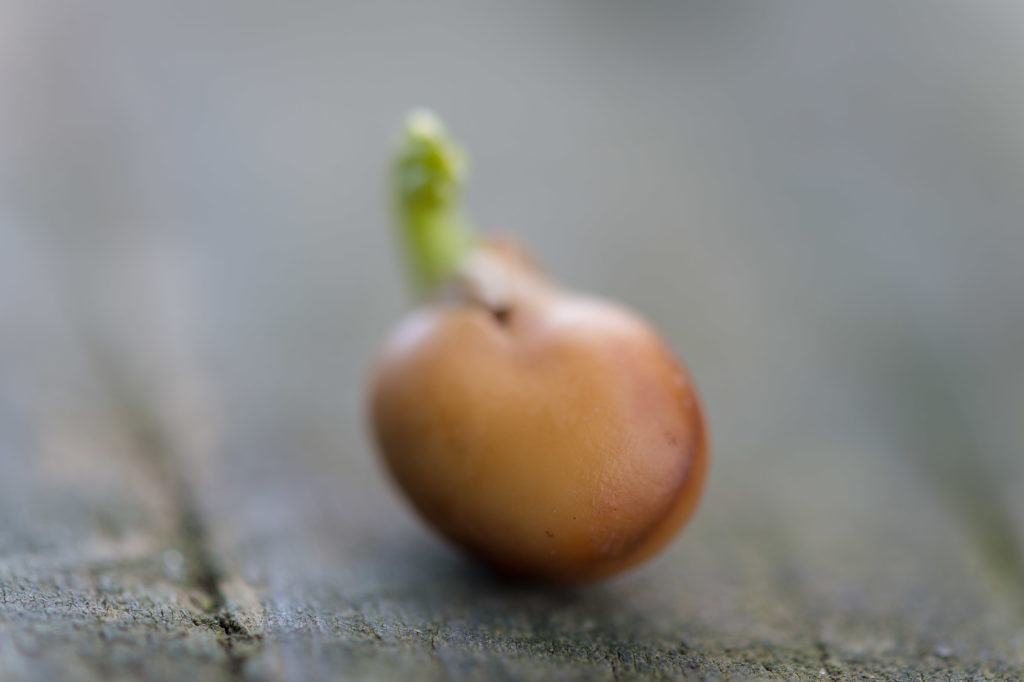
The adjacent image is a single image showing how little depth of field you have to work with having a subject so close to the lens (approximately 50mm).
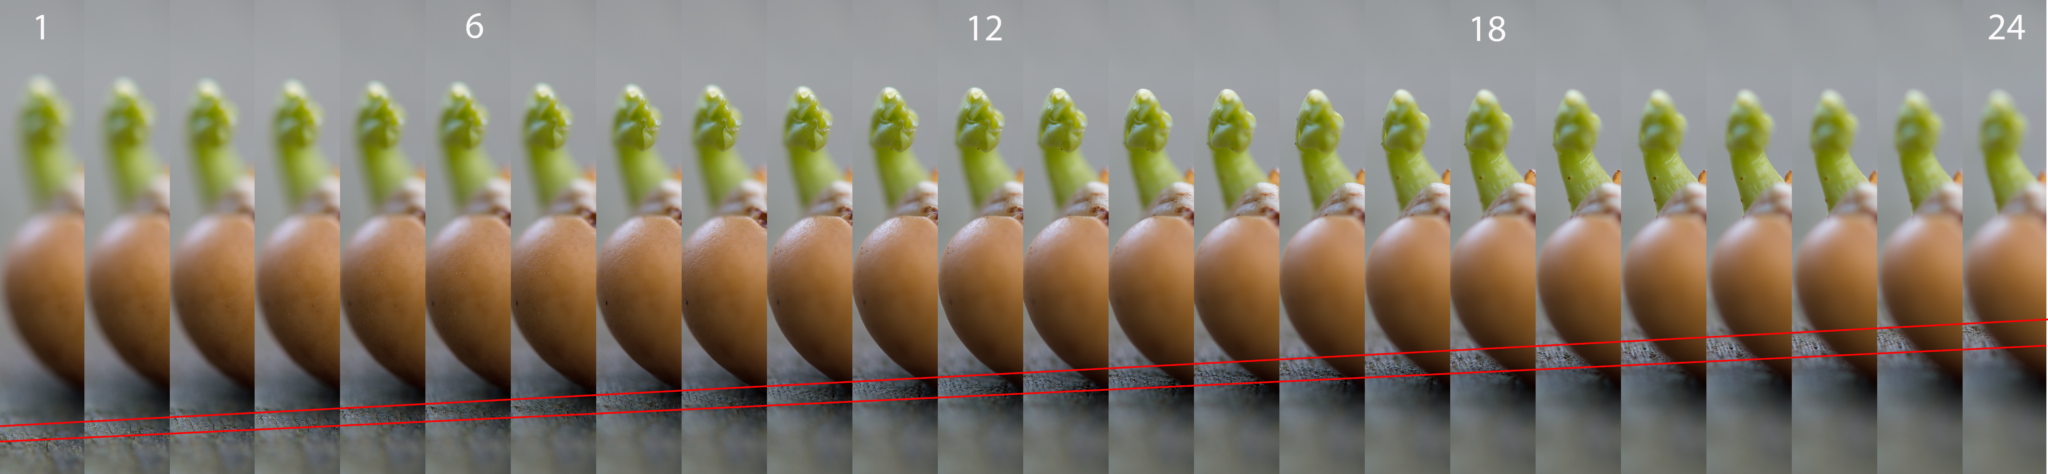
The image shown below is a composite of the 24 images that make up the final image and you can see the area of focus in each image (approximately 2-3 mm) that is bounded by the red lines (on the ground plane) through the image. Frame 1 is focussed towards the front of the subject and frame 24 towards the back.
Once the subject is selected the camera is positioned on a tripod, realistically you can’t hold the camera still enough to get this sort of control without using something like a tripod to stabilise the camera. After a few test shots to determine the exposure and ensure you can move the lens without disturbing the subject, you can carefully take the first exposure (using a remote release to avoid moving the camera) and the adjust the focus a little and take the next shot… and so on!
One tip is to take a photo of your hand between each sequence of shots as this makes identifying the ‘sets’ of images easier when you come to post process them.
Typically you may require a few attempts to get the whole image covered adequately, always try to start further forward than you think you will need too and go further past the subject to ensure you have everything in focus. You can always not use frames if they are not needed but you can’t easily simulate missing frames!
Once you have all the raw images you need for your sequence you will need to come back to the computer for the next phase.
The next phase involves using software to combine all the images into a single image that has the subject entirely in focus. Software such as Adobe Photoshop, Zerene Stacker or Helicon Focus are the most common applications to use. I personally liked using Helicon Focus after trying each of the applications. there are free trials so you can try them out before you purchase them. Both vendors have active forums so you can learn lots of useful tips from there.

These products use advanced algorithms to produce a depth map of the subject and select the part from each layer that is in focus. There are a number of setting you can adjust to find the best combination for your particular image, to avoid artifacts, halo’s and other unwanted distractions.
The best thing is to experiment and learn by making mistakes and just trying it out.